How to Set It Up
Configure and launch your first AI interview in 5–10 minutes.
Before You Begin
You'll need:
- A hifrank.ai account
- A clear research goal (e.g., "understand why users cancel")
- Your target audience ready to receive the interview link
Time to complete: 5–10 minutes
Tip: Have your product description ready — 2–3 sentences about what you're building and who it's for.
Step-by-Step Instructions
Step 1. Access AI Interviewer
Sign up and log in to your hifrank.ai account
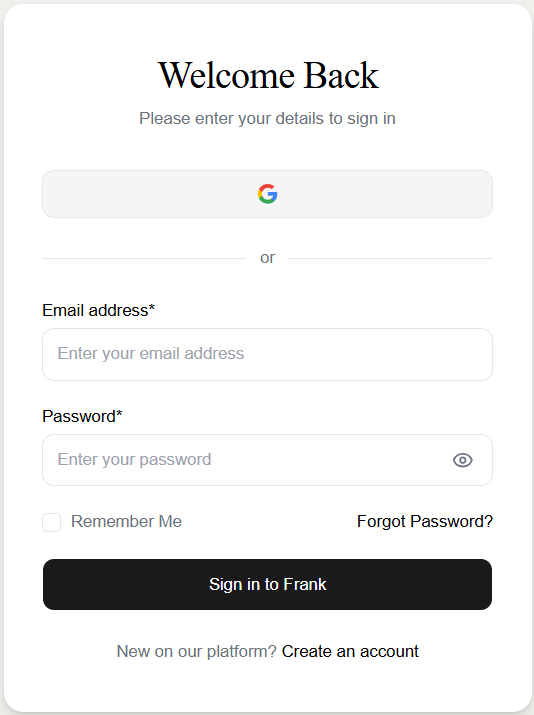
Select New research from your dashboard in the top right corner
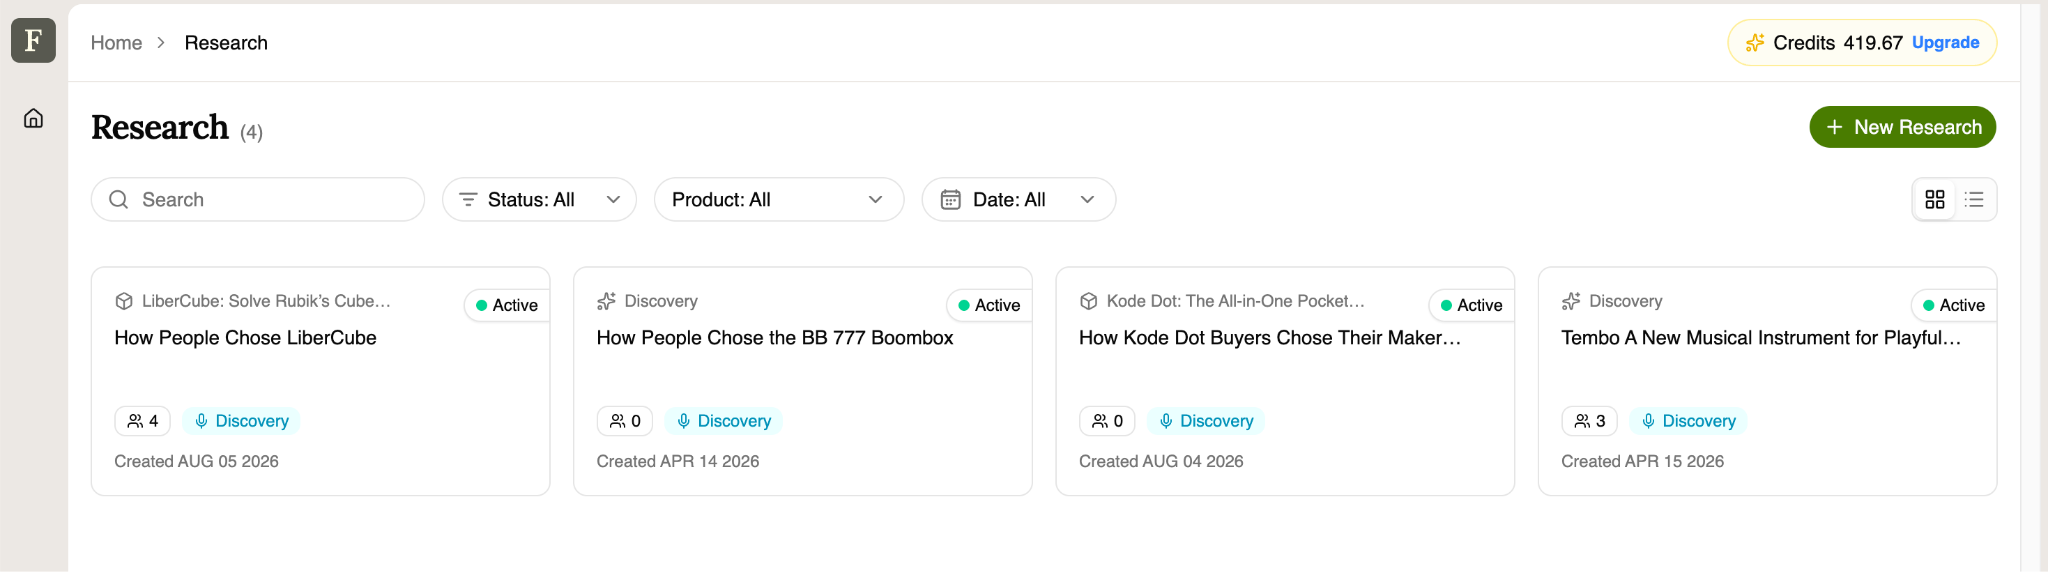
If you're new, you'll land on the sign-in screen. You can continue with Google in one click, or enter your email and password manually. Check "Remember Me" to stay signed in, and use "Forgot Password?" if needed. First time here? Use the "Create an account" link at the bottom to sign up instead.
Tip: The same screen is used for both signing in and signing up — just switch via the "Create an account" / sign-in link at the bottom.
Step 2. Choose Your Interview Type
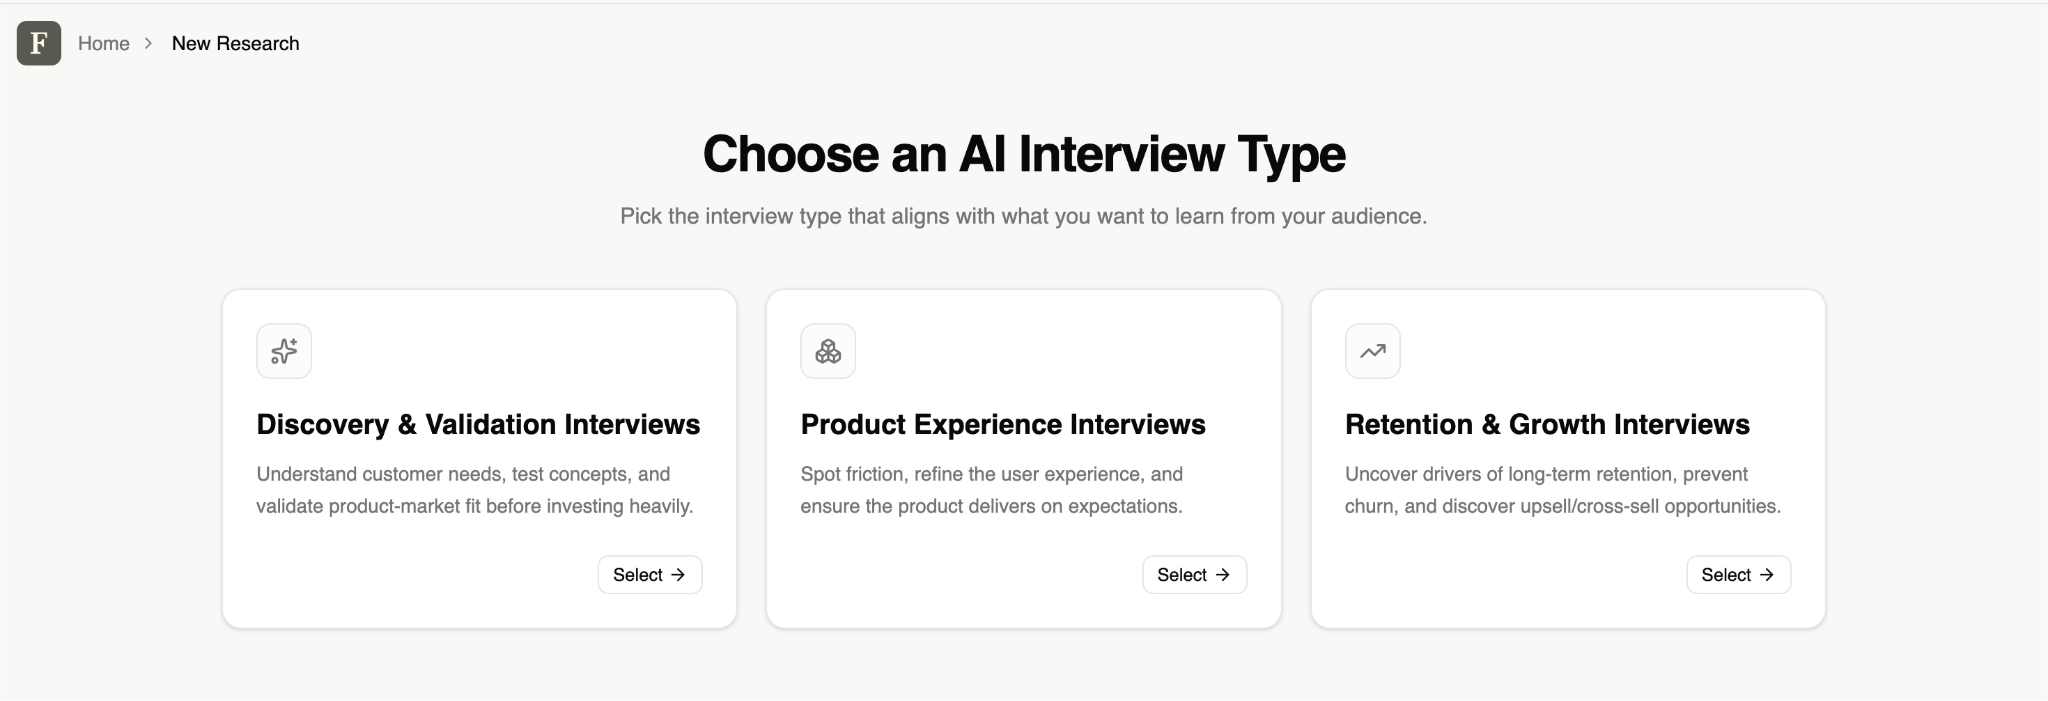
Pick the interview type that aligns with what you want to learn from your audience. Three options are presented side by side:
Discovery & Validation Interviews
When to use: Early-stage research, before building or launching
Interview types:
- Exploratory / Discovery: understand customer needs and pain points
- Concept Testing: validate ideas before building
- Messaging & Positioning: test how to communicate your value
- Pricing & Value Perception: understand willingness to pay
Goal: Understand customer needs, test concepts, and validate product-market fit before investing heavily.
Product Experience Interviews
When to use: During or after development
Interview types:
- Prototype / Usability Testing: find friction points in your product
- Pre-Launch "Expectation": gauge what users expect before release
- Post-Release Satisfaction: measure how well the product delivered
Goal: Spot friction, refine the user experience, and ensure the product delivers on expectations.
Retention & Growth Interviews
When to use: After launch, optimizing for long-term success
Interview types:
- Engagement & Habit: understand what drives regular usage
- Churn / Exit: learn why customers leave
- Retention & Expansion: discover upsell and cross-sell opportunities
Goal: Uncover drivers of long-term retention, prevent churn, and discover upsell/cross-sell opportunities.
Step 3. Describe Your Research Goal
Next, Frank (the AI assistant) asks: "What's your research goal?" — describe what you'd like to learn, and Frank will help design the right study.
- Type a short description of your research goal in the text box
- If a product is already connected, its overview is shown automatically above the input — you can add extra context in the box if needed
- The connected product appears as a tag at the bottom (e.g., "Product Connected: LiberCube: Solve Rubik's C..."), with an X to remove/change it
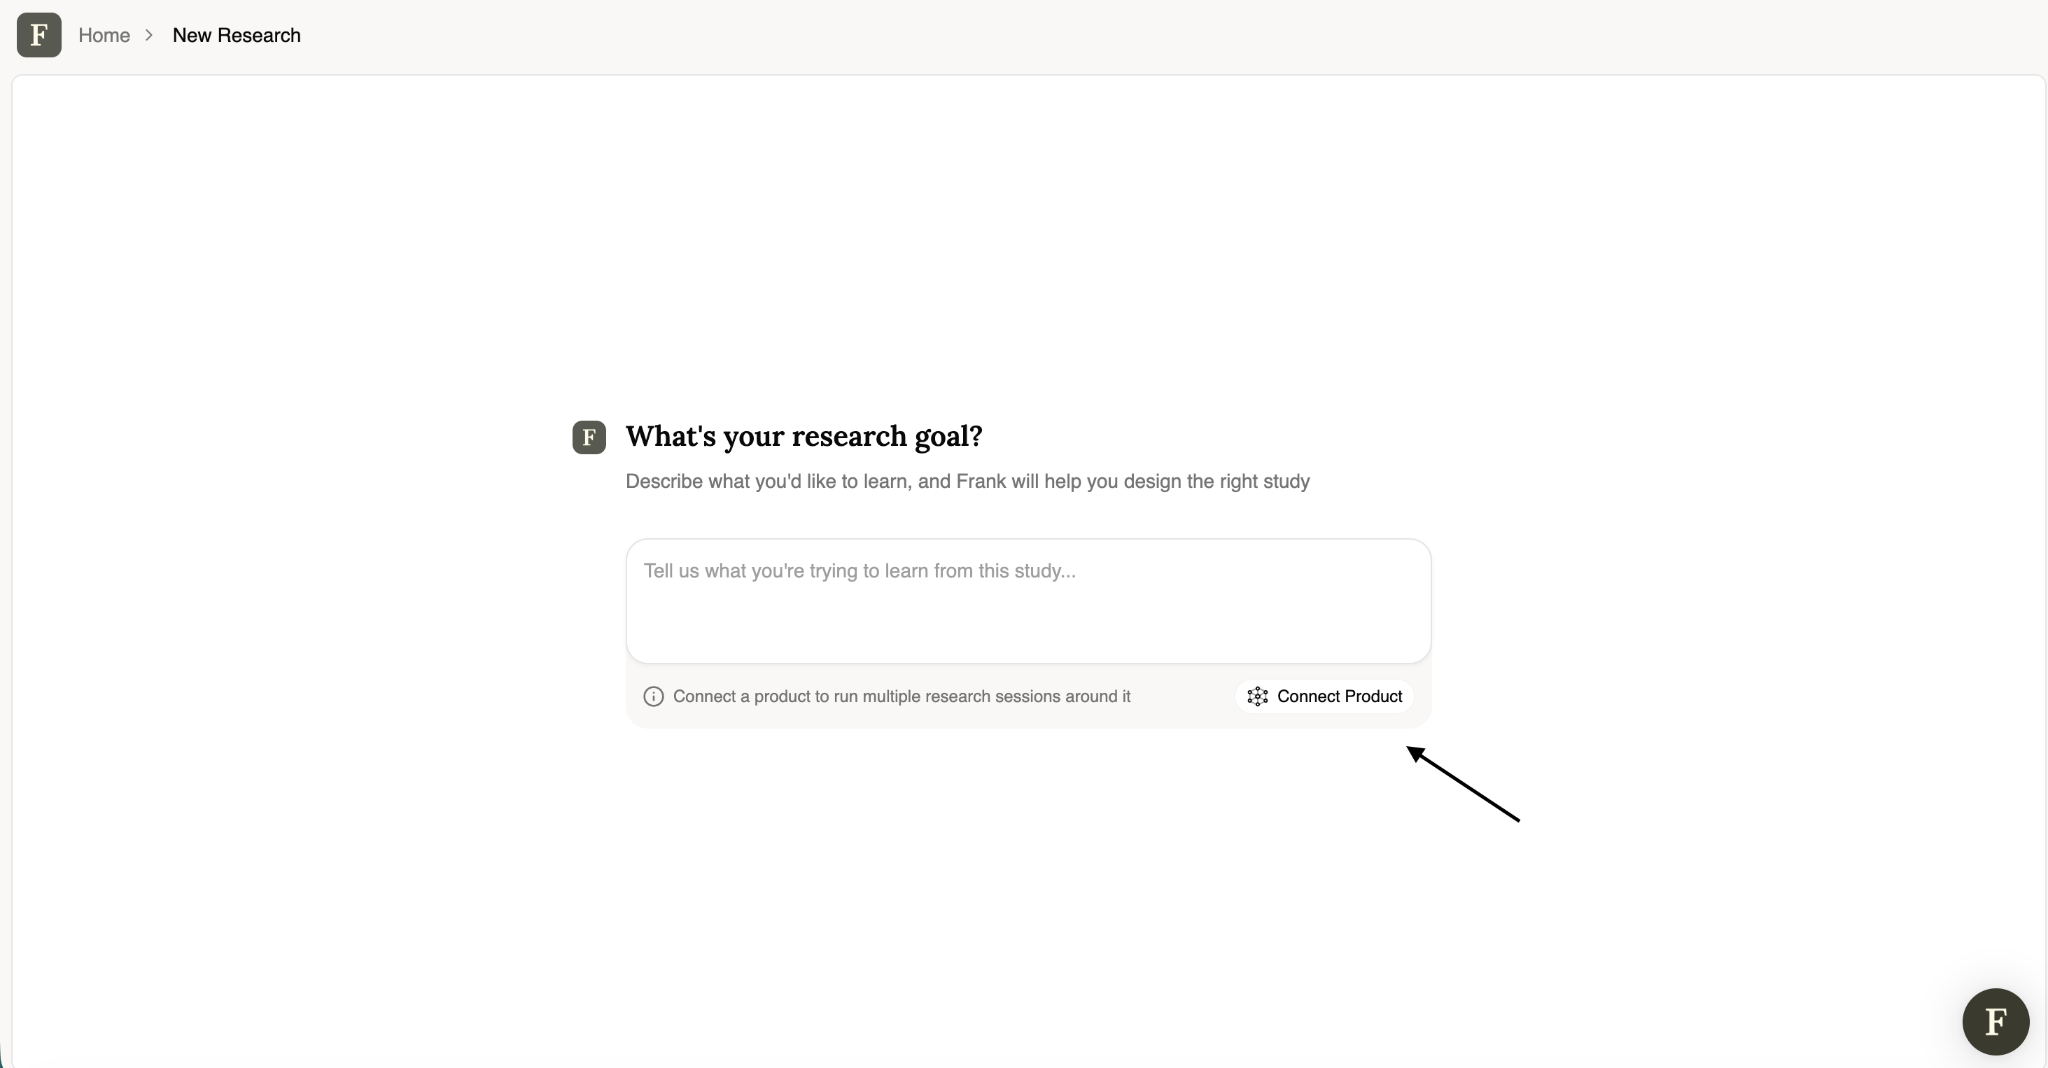
Tip: If your product is already connected, you don't need to redescribe it — Frank pulls from the existing Product Overview and only needs your specific research goal.
Click the green arrow button to submit and continue.
Step 4. Create Your Product
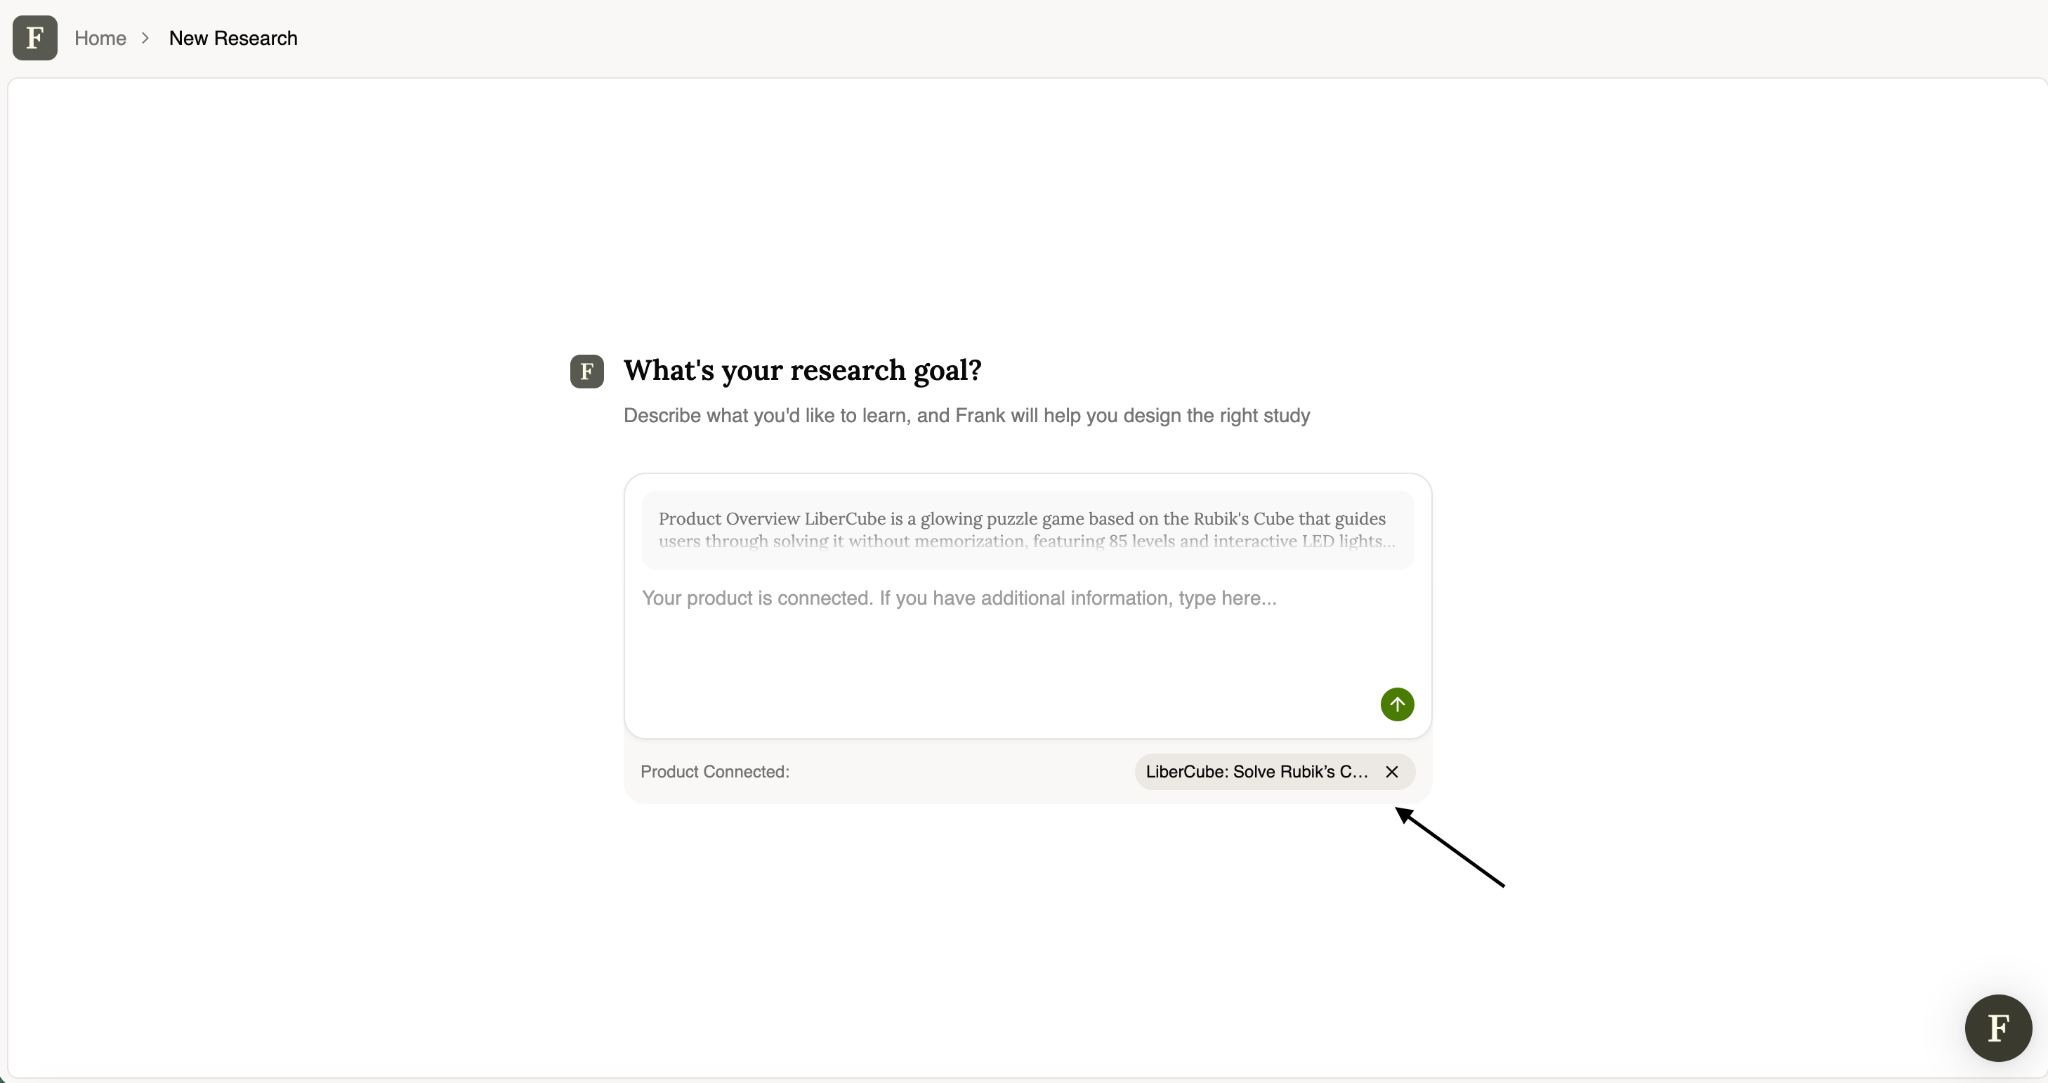
If you don't have a product connected yet, you'll land on the New Product page (Home > Products > New Product). This is a split-screen form: you fill in details on the left, and Frank auto-generates a live Product Brief on the right as you type.
Left panel — Product details
- Product Name * — what your customers call it (e.g., "LiberCube: Solve Rubik's Cube Without Memorizing")
- Add a logo or cover image (optional) — accepts PNG, JPG, or SVG
- Category * — pick the one that fits best from pill-style options: SaaS/Software, Mobile App, Apparel & Accessories, Beauty & Personal Care, Home & Living, Electronics/Consumer Tech, Sports & Outdoor, Toys & Hobbies, Food & Beverages, Health & Wellness, Pet Products, Automotive Accessories, Office & Stationery, Online Services, Offline Services, Other
- Description * — what the product does and who it's for — a free-text box (1500 character limit) with an Attach Files option for supporting documents
- Website (optional) — a public URL that gives participants more context, e.g. https://yourproduct.com
Right panel — Product Brief ("Summarized by Frank")
As you fill in the form, Frank automatically drafts a structured product brief on the right. Each section can be refreshed individually via the Regenerate icon, or edited directly via the pencil icon.
- Product Overview — a one- to two-sentence summary of what the product is
- What It Does — a fuller explanation of how the product works
- Target Users — who the product is for (shows "Not specified in provided sources" if the description doesn't cover this)
- Key Features — a bullet list of standout features
- Value Proposition — the core problem solved and why it matters
- Use Cases — concrete scenarios in which someone would use the product
- Differentiators — what sets the product apart from alternatives
Top navigation
- Save — saves the product without proceeding
- Continue to research — saves the product and moves forward into the research setup flow
Tip: The richer the Description you provide, the more complete and accurate the auto-generated Product Brief will be — vague descriptions tend to leave sections like Target Users unfilled.
Step 5. Refine & Generate Your Research Guide
- Frank now moves into a split-screen builder: a chat on the left to refine the study, and a live-updating Research Guide preview on the right.Left panel — "Set your research goals" (chat)
- Frank asks clarifying questions to sharpen the study, starting with interview duration — presented as quick-pick buttons: 5 / 10 / 15 / 20 / 30 minutes
- Once you pick a duration, Frank drafts (or updates) the guide and explains what it built, then offers follow-up action buttons:
- Looks good — generate it — confirms and generates the final guide
- Add a question — lets you insert an additional question
- Adjust the goal — lets you revise the research goal
- Let me think — pauses without committing
- A free-text box at the bottom ("Tell us what you're trying to learn from this study...") lets you type custom instructions or answers at any point
- Once confirmed, Frank confirms: "Your discussion guide is ready! Click Continue to get your interview link."
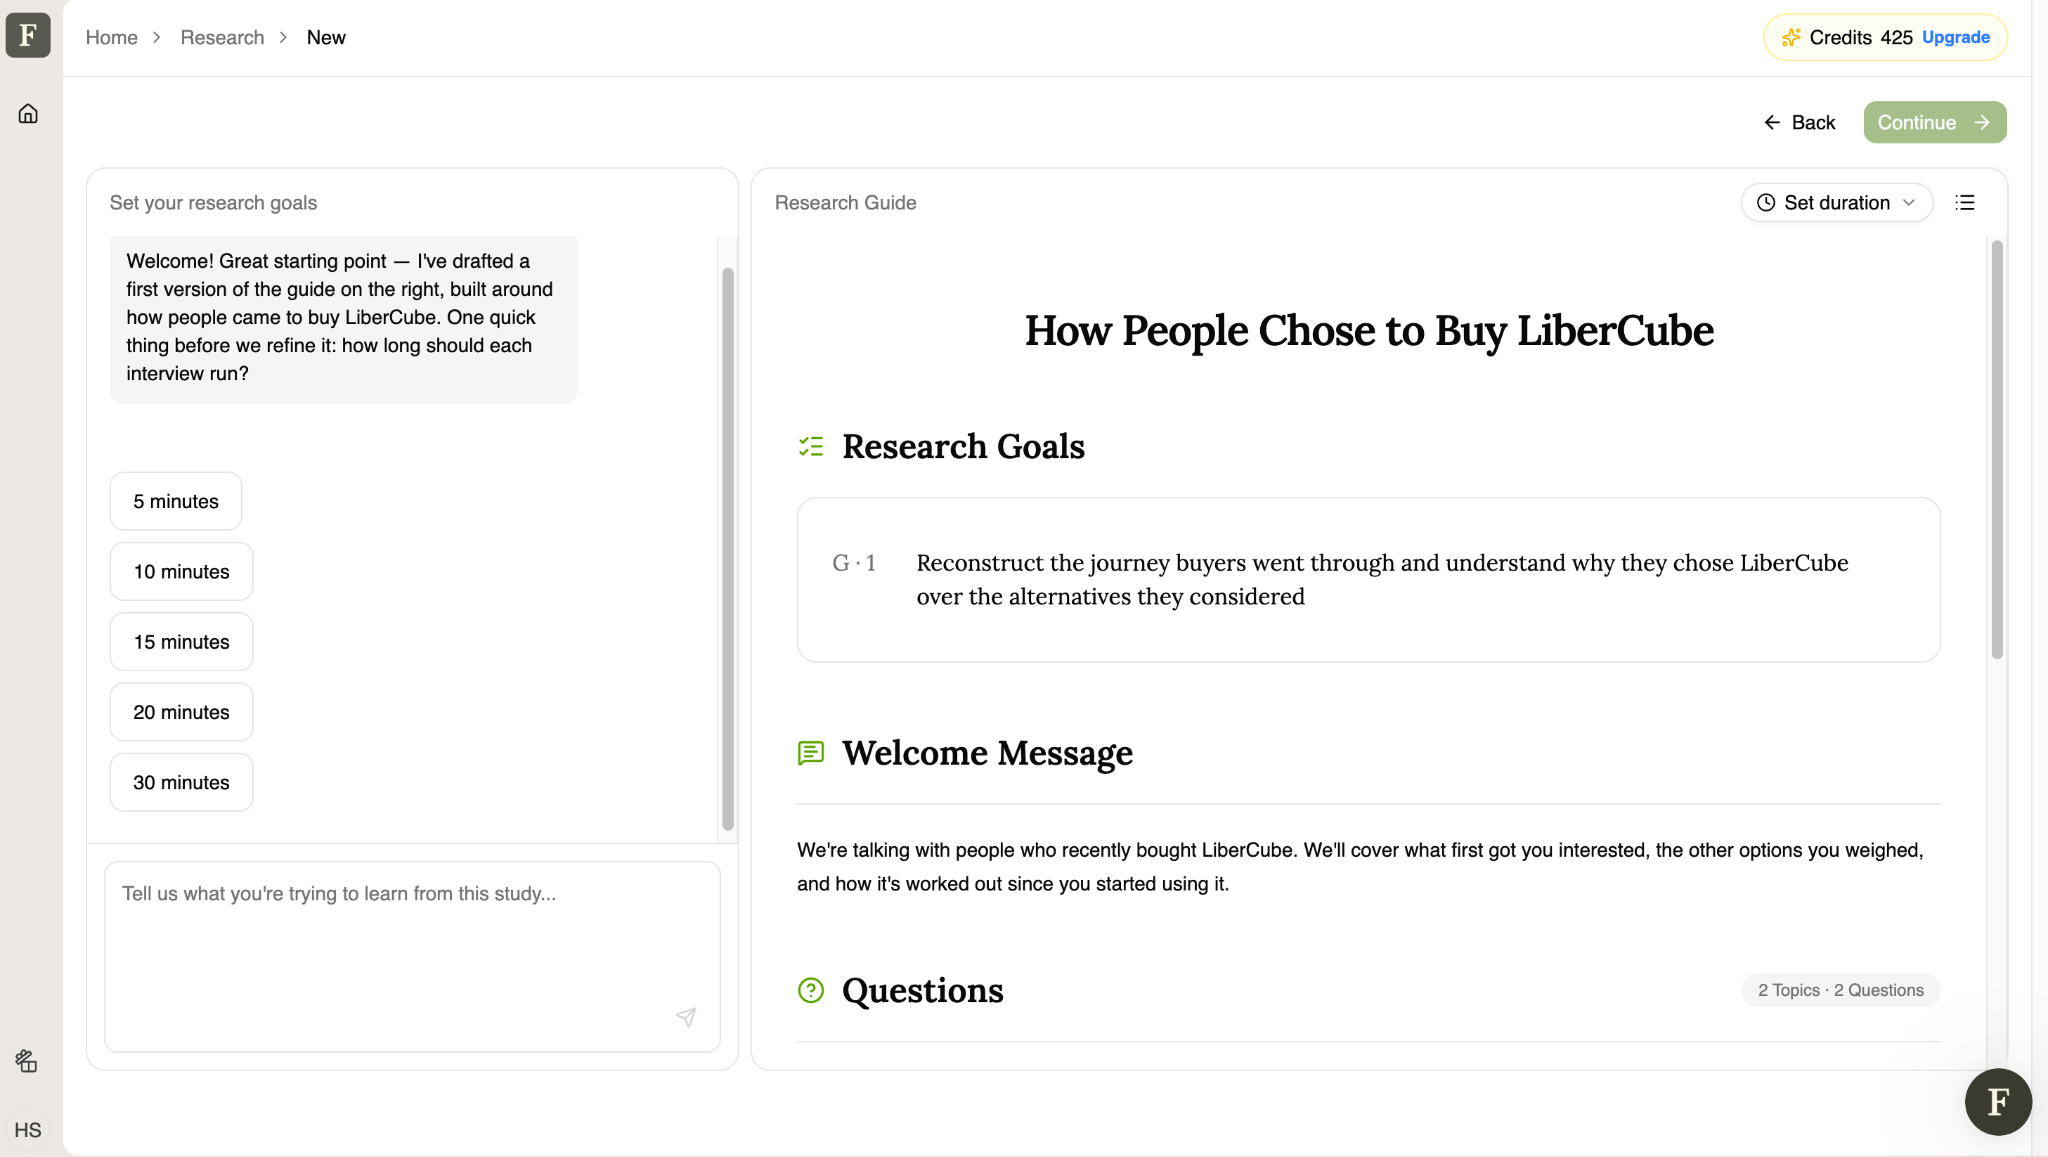
Right panel — "Research Guide" (live preview)
This is the actual guide that will drive the AI interviewer, broken into sections:
Header controls:
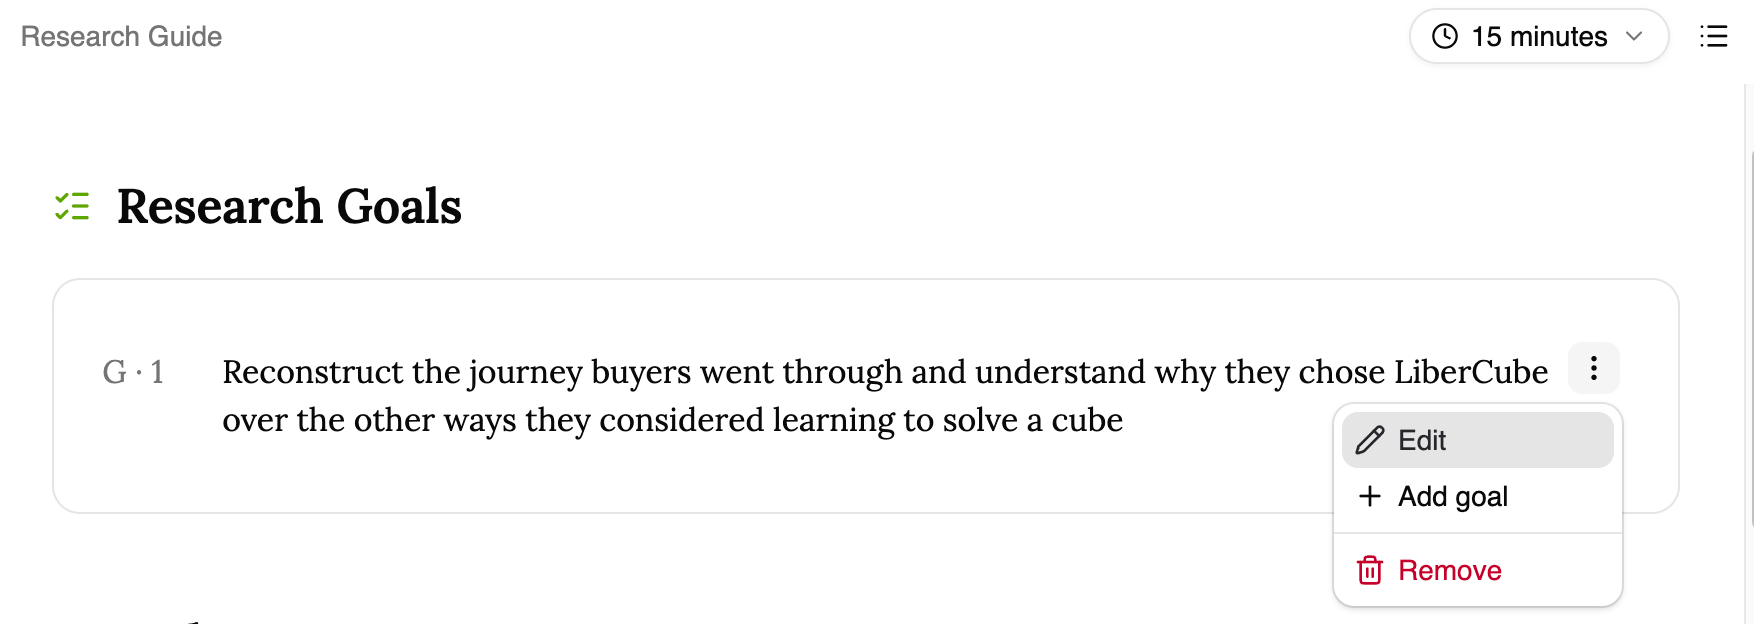
- Set duration dropdown — shows/edits the selected interview length (e.g., "15 minutes")
- List icon (top right) — likely a table-of-contents / outline view toggle
Guide sections:
- Research Goals — numbered goal statements (e.g., "G·1"). Each goal has a ⋮ menu with Edit, Add goal, and Remove options
- Welcome Message — the intro text the AI interviewer reads to participants, explaining the study's purpose in plain language

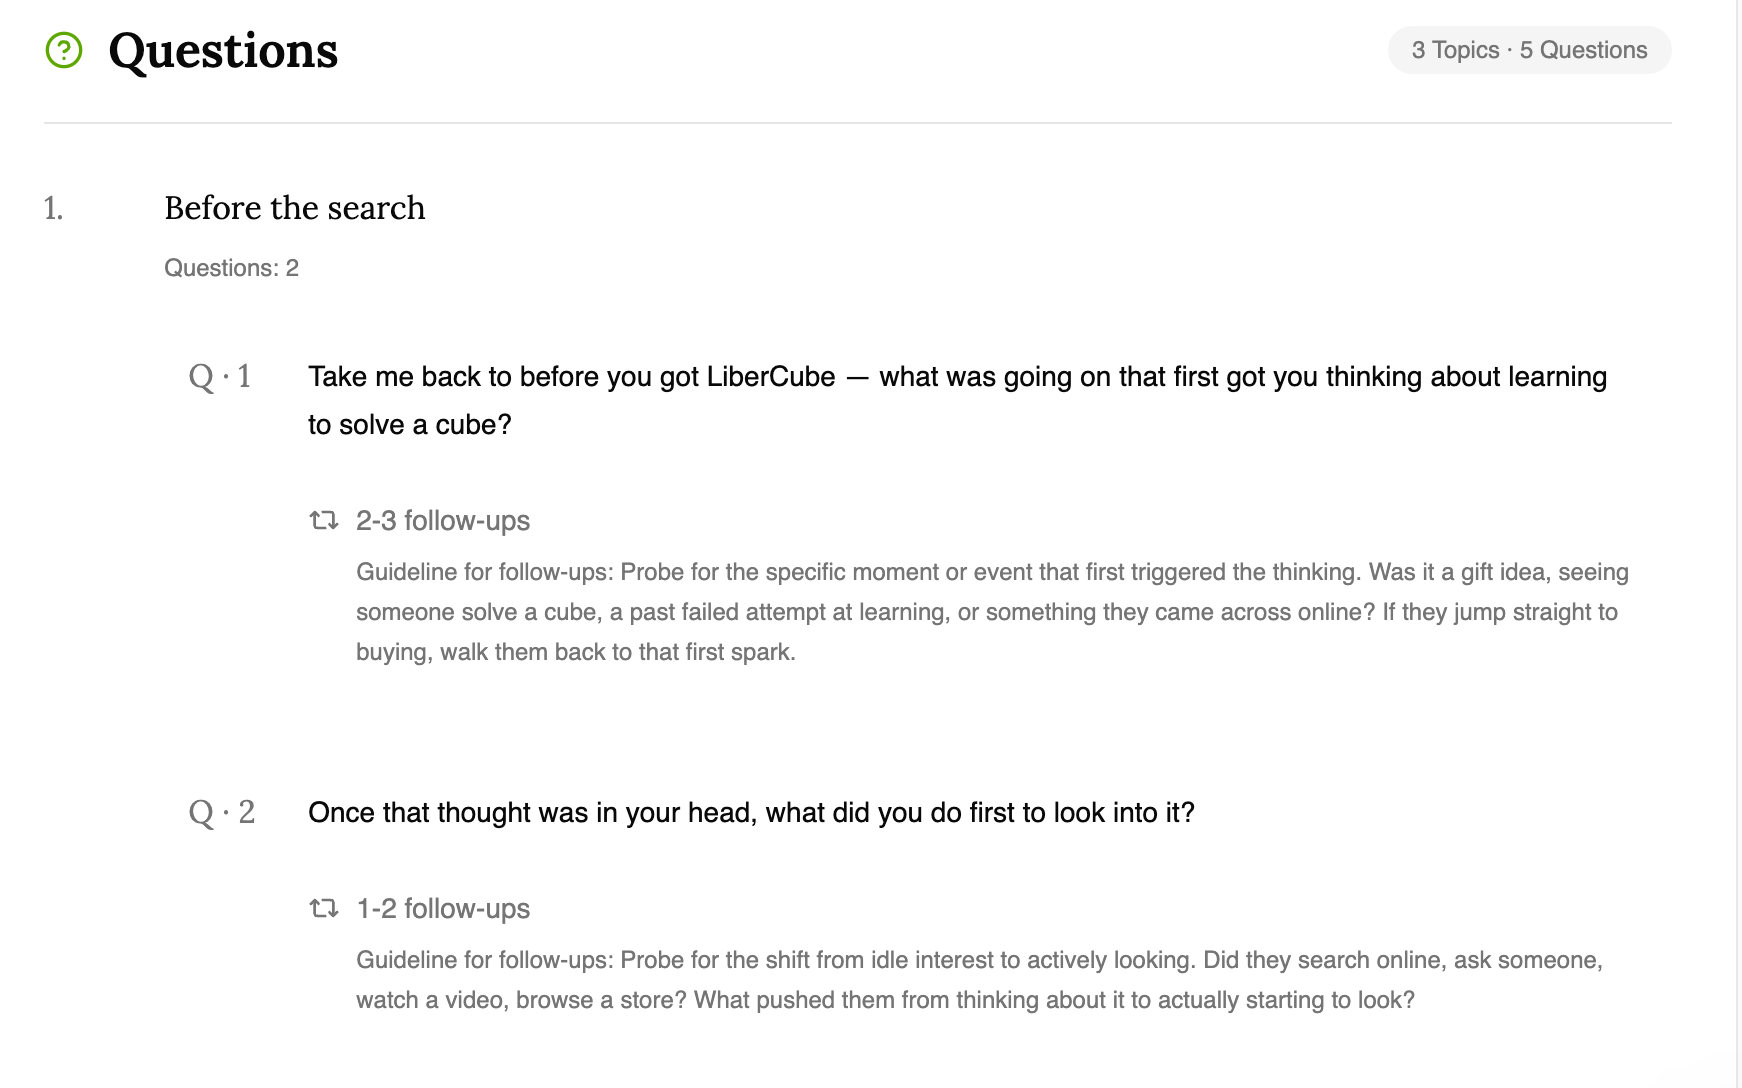
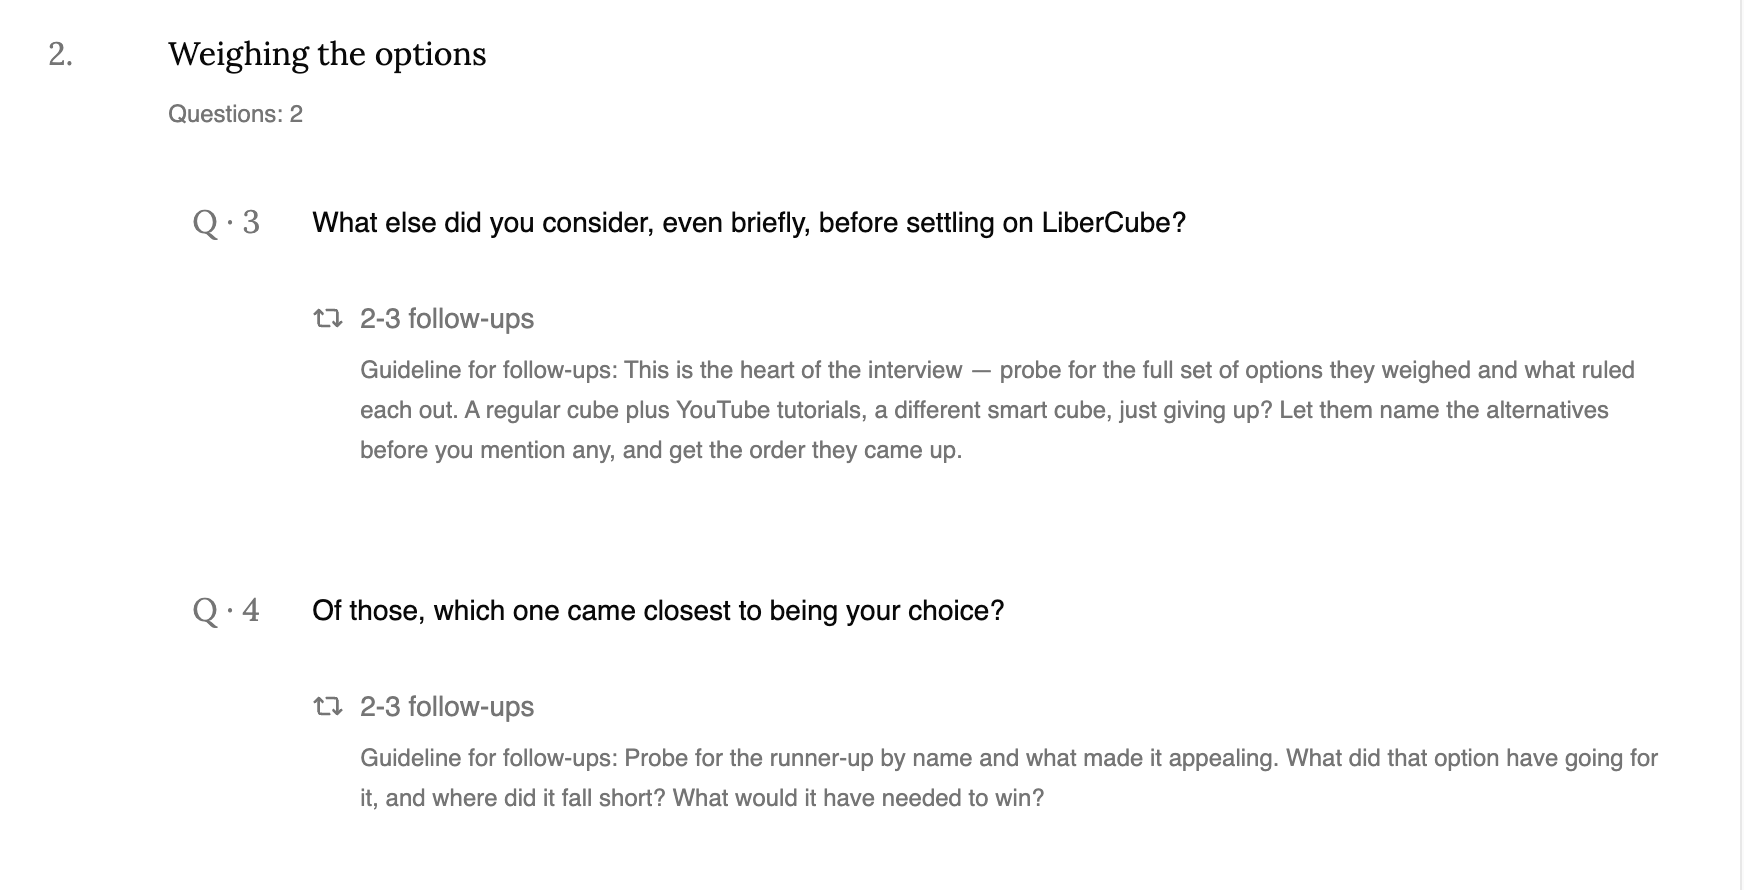
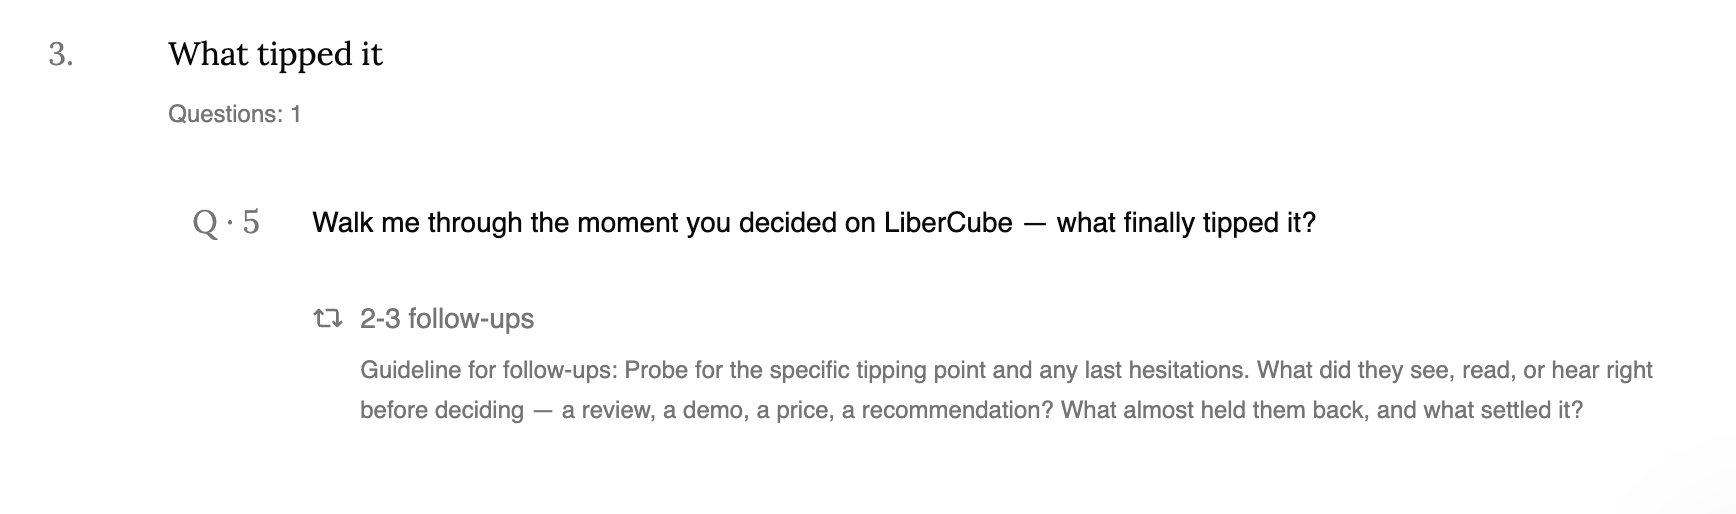
- Questions — organized into numbered topics (e.g., "1. Before the search," "2. Weighing the options," "3. What tipped it"), with a summary count at the top-right (e.g., "3 Topics · 5 Questions"). Each topic also has a ⋮ menu with Edit, Add topic, and Remove
- Each question is labeled Q·# and shows:
- The main question text
- A follow-ups indicator (e.g., "2-3 follow-ups")
- A guideline note explaining what the AI interviewer should probe for during follow-ups
- Each individual question also has its own ⋮ menu (Edit, Add question, Remove). The changes apply in the left panel as well.
Top navigation
- Back - returns to the previous step
- Continue - proceeds once the guide is finalized (button is greyed out until ready, then turns green/active)
Tip: Step 5 is where the AI turns a one-line goal into a structured, editable interview script — goals, welcome message, and topic-organized questions with built-in follow-up guidance — before the study goes live.
Step 6. Set Your Study Format
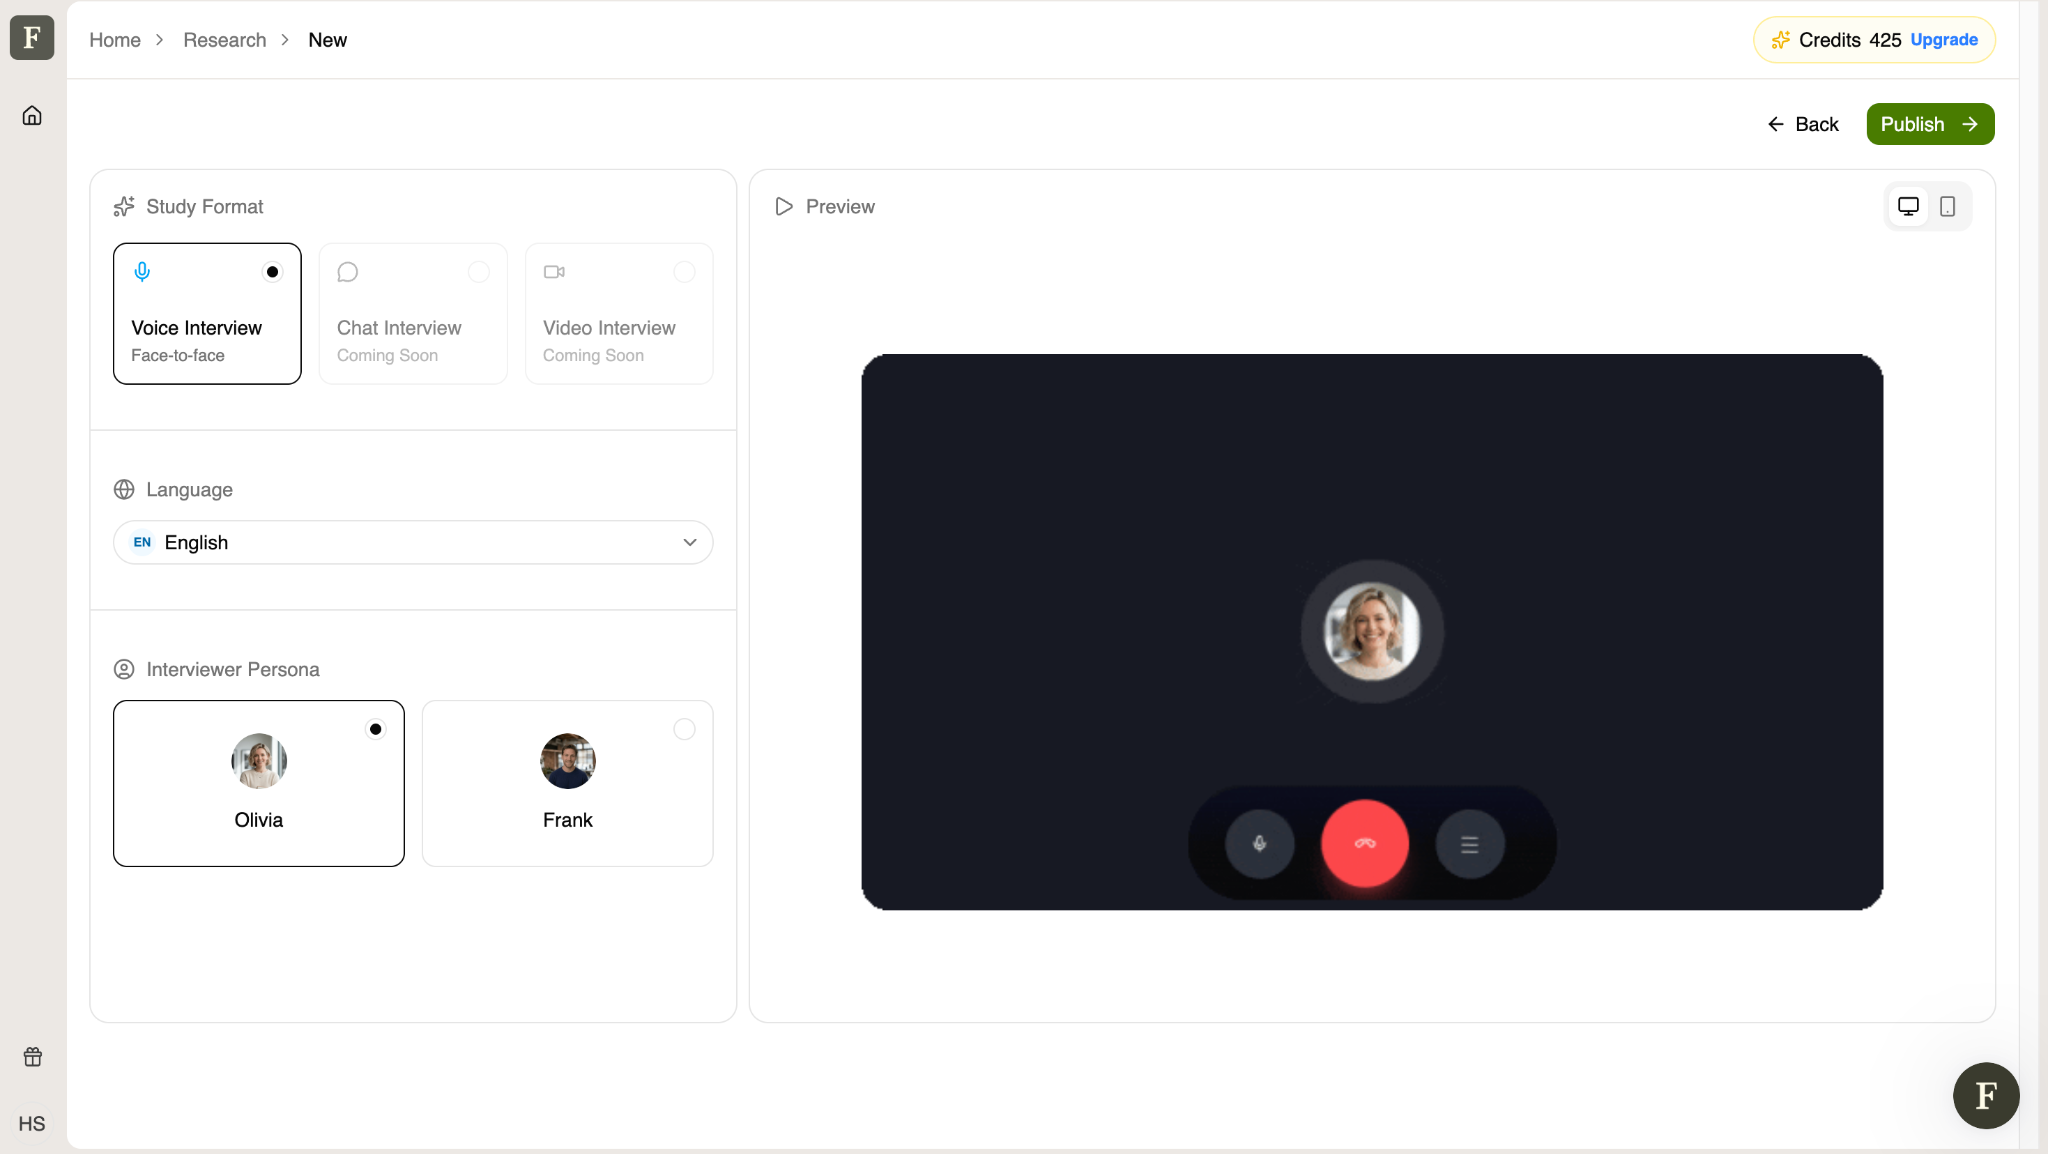
Next, configure how the interview will actually be conducted. This page is also split-screen: settings on the left, a live Preview of the interviewer experience on the right.
Left panel — Study Format
- Study Format — choose how participants will be interviewed:
- Voice Interview (Face-to-face) — available now
- Chat Interview — Coming Soon
- Video Interview — Coming Soon
- Language — select the interview language from a dropdown, including Chinese, English, French, German, Italian, Japanese, Korean, Portuguese, Spanish, or Multilanguage
- Interviewer Persona — choose which AI persona conducts the interview — currently Olivia or Frank, each shown with a name and avatar
Right panel — Preview
A live preview of what participants will see and hear, styled as a video-call interface with the selected interviewer's avatar. Includes mute, end-call, and menu controls, plus a toggle (top-right) to preview on desktop or mobile.
Top navigation
- Back — returns to the previous step
- Publish — finalizes the study and moves to sharing (Step 7)
Step 7. Publish & Share Your Interview
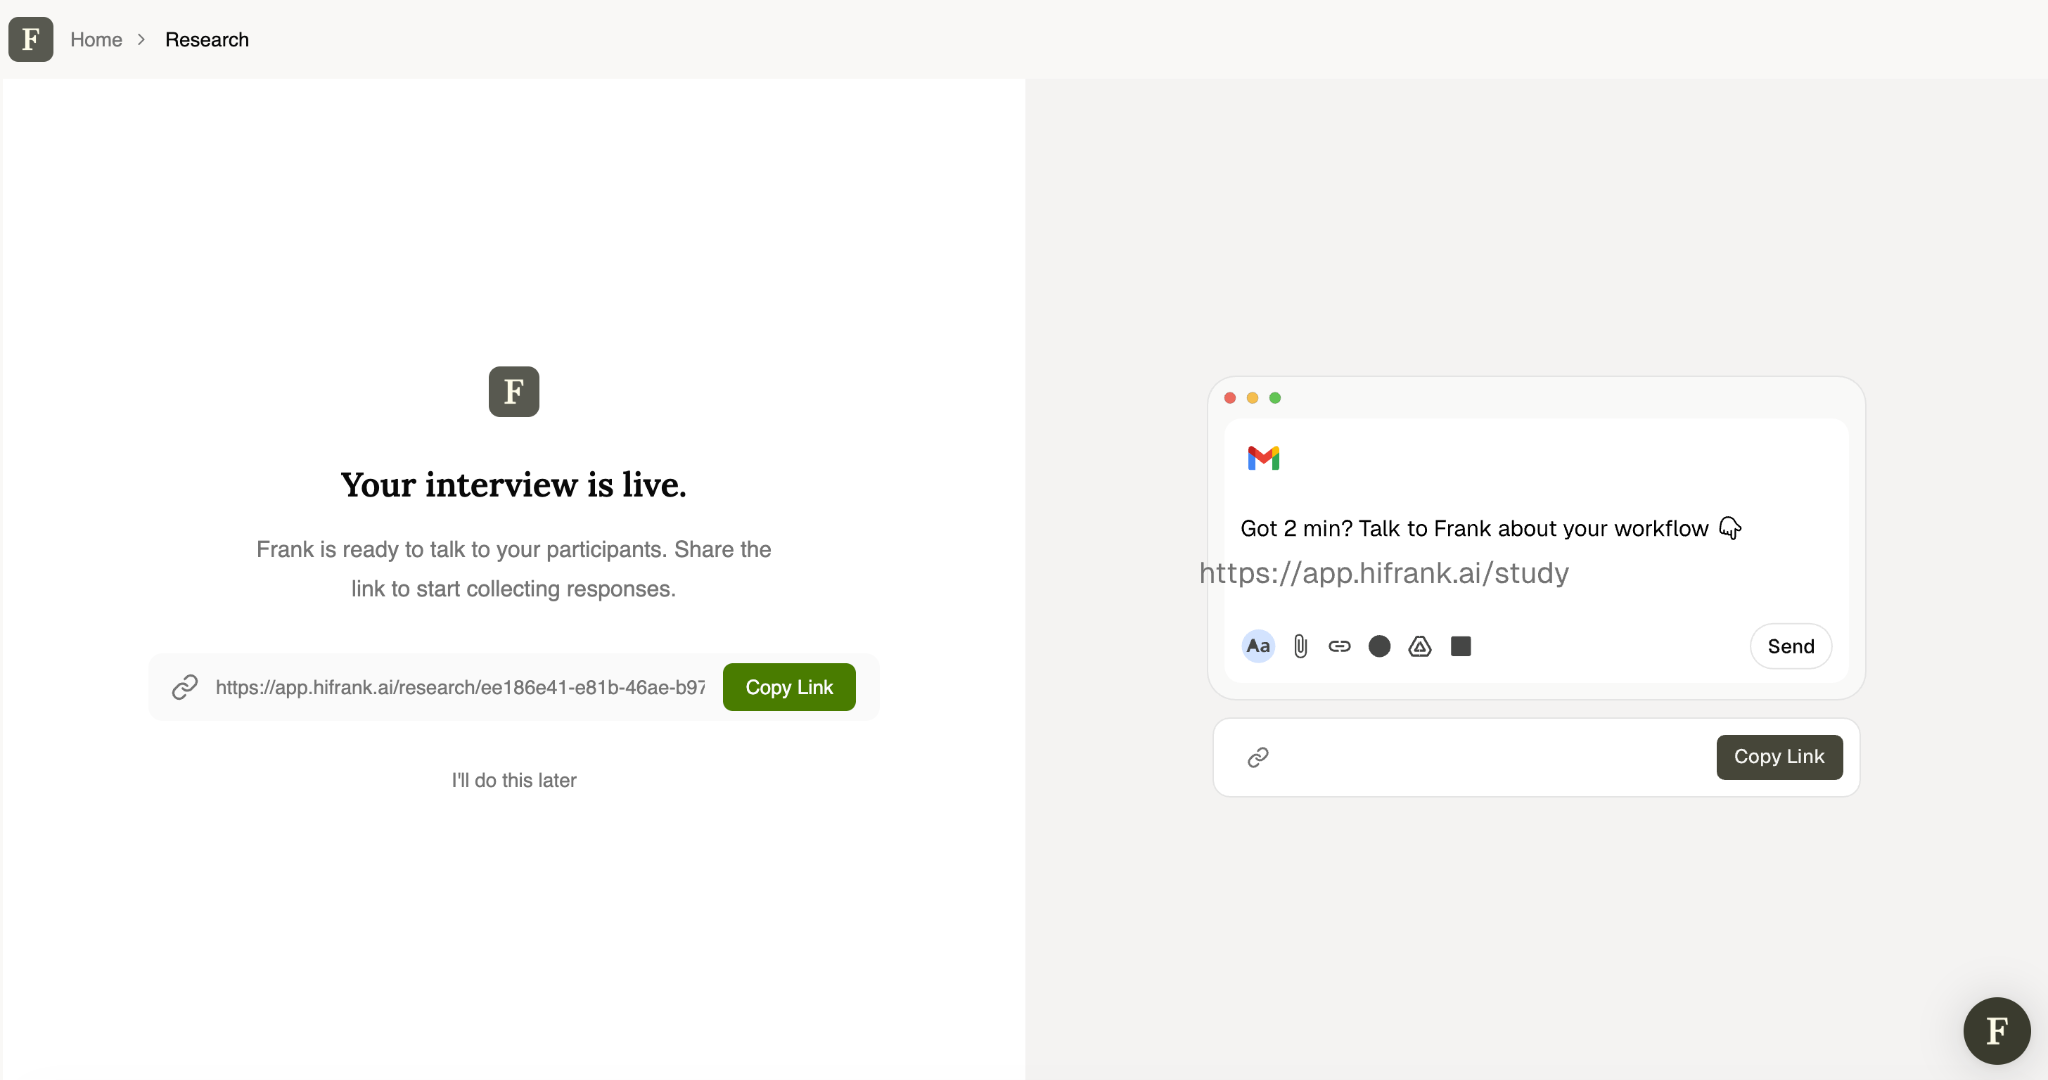
Once published, your study goes live and you're taken to a confirmation screen: "Your interview is live." — Frank is ready to talk to your participants.
- A shareable interview link is generated automatically (e.g., https://app.hifrank.ai/research/[study-id])
- Copy Link — copies the link to your clipboard so you can send it through any channel (email, Slack, social, etc.)
- I'll do this later — dismisses the share screen if you're not ready to distribute the link yet
From here, you can paste the link into an email or message to invite participants — for example, sharing it directly through Gmail with a short note like "Got 2 min? Talk to Frank about your workflow."
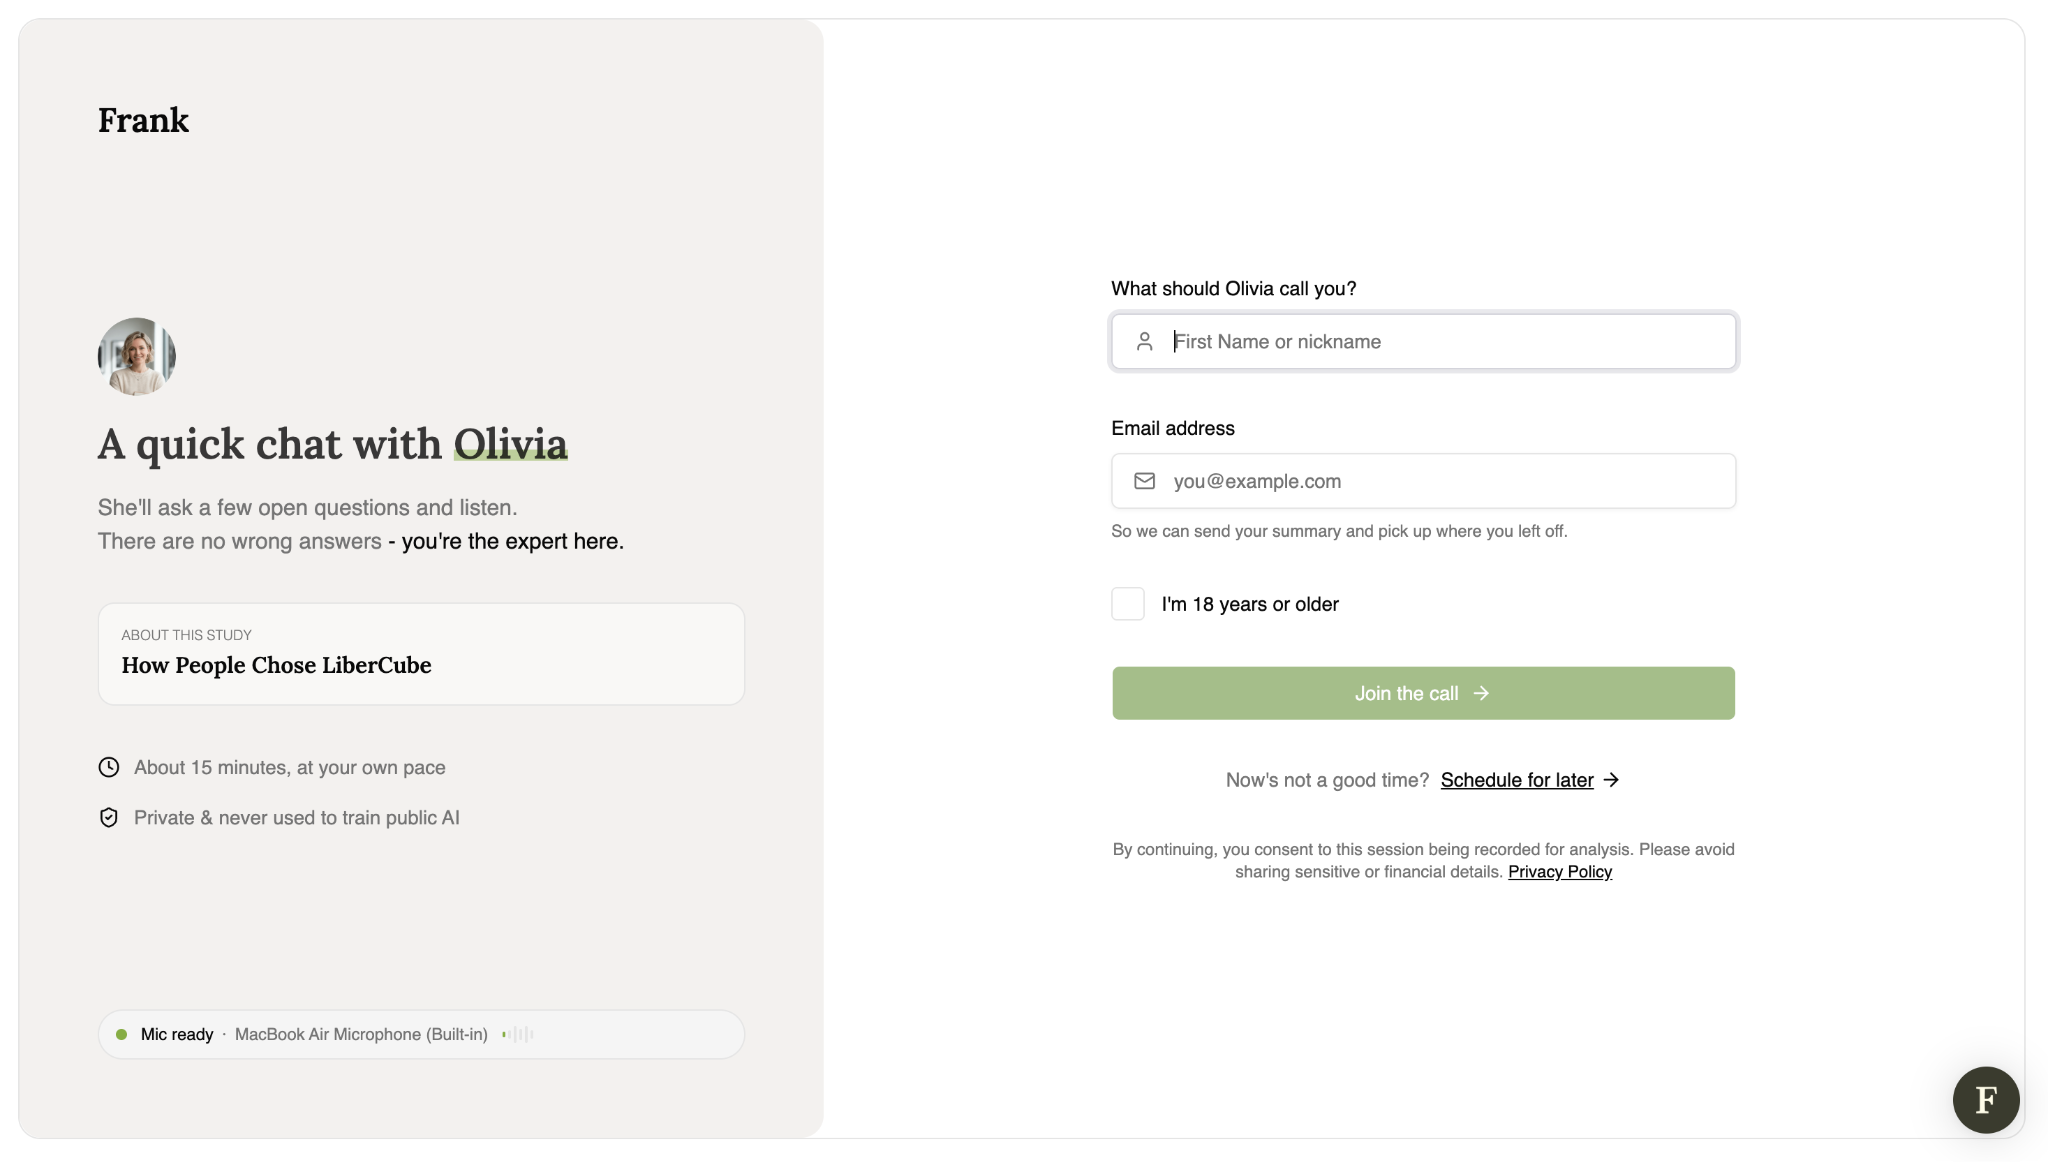
Tip: Anyone with the link can start the AI-moderated interview immediately — no additional setup is needed on their end. Responses will begin appearing in the study's Interviews tab as participants complete the conversation.
Step 8. Test Your Interview Highly Recommended
- Your interview link is now generated and visible on screen
- Click the link to open it in a new tab
- Complete the interview as if you were a customer
- Review your test interview in the dashboard
- Make any needed adjustments
Tip: Testing takes 5–10 minutes but prevents issues with real customers.